Fifty words. That's all you get - and for fiction authors, even that might be pushing it. Industry guidance puts the ideal WordPress author bio for fiction at under 50 words, yet I regularly see debut novelists cramming in their entire life story, their cat's name, and a philosophical statement about why stories matter.
The result? Readers scroll straight past it.
I've spent years helping indie authors build out their WordPress sites, and the author bio is, without question, the most consistently botched element on the page. Not the cover image. Not the book blurb.
The bio. A small text box that most authors treat as an afterthought ends up being one of the first things a curious reader checks after they've finished a sample chapter and want to know: who wrote this, and should I trust them with my reading time?
Here's what nobody tells you upfront: that little bio isn't just a courtesy. It's doing real marketing work. When it's written well and set up correctly in WordPress - with the right profile fields, a proper headshot, a plugin that actually displays it cleanly, and schema markup that tells search engines you're a real, credible author - it becomes a direct line between your book showcase and a reader deciding to buy.
50–100
words is the standard range for an online author bio - with fiction bios recommended under 50 for maximum impact
This guide walks you through the whole process, from drafting bio content that actually connects with your target readers, to the WordPress mechanics of getting it live and looking sharp. We'll cover what belongs in a fiction bio (and what to cut), how to handle your headshot and display name, which author bio plugins are worth your time versus which ones create more problems than they solve, and how to make sure your author pages are indexed and discoverable.
We'll also get into the bits most tutorials skip entirely: SEO for your author bio, schema markup, and the troubleshooting fixes for when your bio disappears, your avatar refuses to load, or your links go nowhere. Dead simple stuff once you know where to look - genuinely baffling if you don't.
By the end, you'll have a bio that's tight, professional, and working hard inside your WordPress setup. Not just sitting there looking like a formality.
Most fiction authors treat their bio as an afterthought - a few lines squeezed in after the book description, ticking a box rather than doing a job. That's a mistake I've watched cost writers real readers. Your author bio is often the first place a curious visitor looks after your cover catches their eye, and what they find there either builds trust or quietly sends them elsewhere.
Here, we'll look at the psychology behind that split-second judgement and how strategic storytelling turns a bland "about me" paragraph into a genuine reader conversion tool.
A Reader's First Impression Beyond the Cover
Readers who land on your book showcase page and find a hollow, two-line author bio leave faster than you'd expect - and they rarely come back. Your cover pulled them in. Your blurb kept them reading. But the moment they scroll to your bio and find nothing of substance, that momentum dies.
Your author bio is the second hook. Not a formality. Not a box to tick before you hit publish. It's the point where a curious browser decides whether you're worth trusting - and in fiction, trust is what sells books.
Personal connection drives fiction sales in a way it simply doesn't in non-fiction. Readers of thrillers, romance, and fantasy aren't just buying a plot; they're buying into a voice, a sensibility, a person. A well-placed personal detail - where you live, what obsession fuelled this particular story - can close that gap between stranger and favourite author faster than any promotional copy.
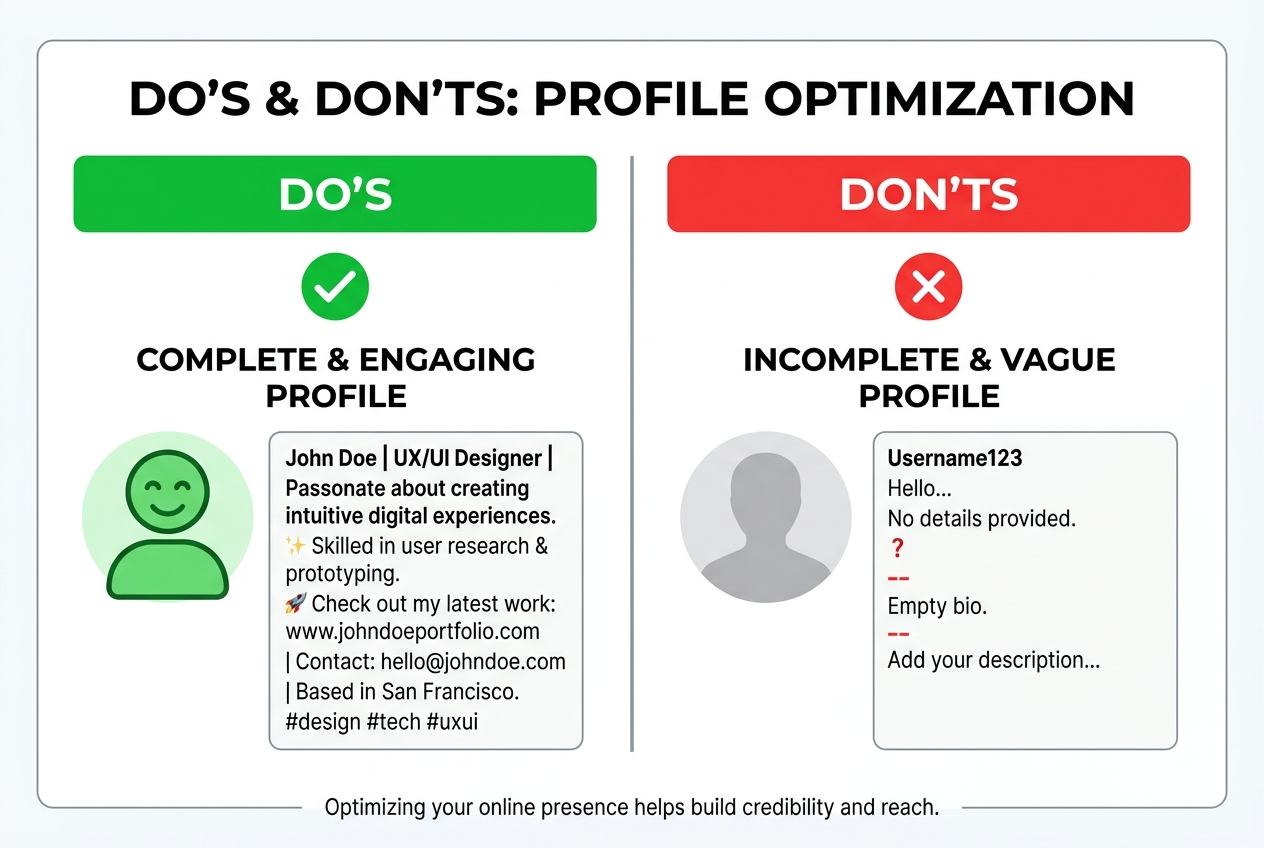
After reviewing dozens of indie author sites, the pattern is clear: bios that perform well introduce the author's voice immediately. They read like the author, not like a press release. That's not accidental - it requires deliberate choices about what specific content elements you include, and in what order.
Writing your bio in first person ("I write dark fantasy because...") looks amateur and makes it harder to cite achievements without sounding self-congratulatory. Third person is the industry standard for a reason - use it.
Third-person perspective isn't just convention. It's a practical tool. "Sarah Holloway spent twelve years as a forensic consultant before writing her debut crime novel" lands very differently from "I spent twelve years..." One positions you as an authority; the other positions you as someone explaining yourself.
Length matters more than most authors realise. General author bios run 50–100 words online, but for fiction showcases, under 50 words is the sharper target. Tight bios force you to keep only what earns its place. Every sentence that doesn't build connection or credibility is a sentence that dilutes both.
There's also a search dimension here. A bio that aligns with E-E-A-T - Google's framework for evaluating Experience, Expertise, Authoritativeness, and Trustworthiness - signals to search engines that your page has legitimate authorship behind it. That's not just good for rankings; it's good for reader confidence. If you're using a fiction book AI writer to help draft content for your showcase, your bio still needs to carry the human authority that no tool can manufacture for you.
Skipping this work has a real cost. Readers who can't find a credible, engaging author bio on your WordPress showcase page are less likely to click through to your book page, less likely to follow your social profiles, and less likely to remember your name when your next title drops.
A weak bio doesn't just fail to help. It actively undermines everything else on the page.
Strategic Storytelling for Fiction Authors
Authors who treat their bio as a narrative tool consistently outperform those who treat it as a résumé dump. That gap isn't subtle - it shows up in click-through rates, social follows, and whether a reader bothers to look up your backlist.
Your bio is a mini-narrative, not a list of credentials. The distinction matters because fiction readers don't buy books from CVs. They buy from authors whose world they want to inhabit, and your bio is the first glimpse of that world.
So what actually belongs in it?
Genre connection comes first. A criminology degree sitting behind a crime thriller isn't just a credential - it's a trust signal. Relevant education, professional background, or lived experience that feeds directly into your subject matter tells readers why you're the person who wrote this book. That specificity is what separates a forgettable bio from one that makes someone click "buy."
After reviewing dozens of author sites, the pattern is clear: bios that anchor credentials to genre outperform generic ones every time. If you write AI for romance chemistry or supernatural thrillers, the personal detail that lands hardest is the one that makes your obsession with the genre feel inevitable.
Published works and awards belong here too - but keep them relevant and recent. Prioritise work from the last ten years. For debut authors without major awards, short story publications and essay credits carry real weight. Don't leave that space empty because you haven't won a prize yet.
The single most common mistake I see is time-sensitive language. Phrases like "coming soon" or "upcoming release" have a shelf life of weeks before they make your bio look abandoned. Write evergreen copy.
No specific dates, no forthcoming-work teasers. Your bio should read accurately whether someone finds it today or in three years.
One personal detail earns its place - where you live, an unusual hobby, something that humanises you without oversharing. That's the balance: professional enough to establish authority, human enough to be interesting. Anything beyond that single personal touch starts eating into your word count for no return. Fiction bios work best under 50 words for most placements, which means every sentence is doing a job.
What to cut is just as deliberate as what to keep. Overly personal information, accomplishments unrelated to your writing, and anything that reads like it belongs in a job application - gone. Readers aren't hiring you. They're deciding whether to spend twelve hours in your fictional world.
Writing in the third person is industry standard for a reason. It lets you state achievements plainly without the awkwardness of self-praise, and it reads cleanly across platforms where your bio gets pulled into different contexts.
The hard part isn't knowing what to include. It's deciding the exact order, the precise phrasing, and how to compress a career's worth of context into under 50 words without losing the story. That's a drafting problem - and it's worth solving on paper before you ever open your WordPress dashboard.
Before you touch a single WordPress setting, the real work happens on the page in front of you - drafting a bio that actually earns a reader's trust. I've watched debut authors spend hours tweaking plugin colours while their biographical text read like a LinkedIn profile written by a committee, and unsurprisingly, their book pages converted nobody. Getting the structure right from the start saves you from that particular embarrassment.
Here, you'll nail down the narrative framework that holds everything together, and discover why the photo sitting alongside that text carries more weight than most authors expect.
Crafting a Concise Narrative
Under 50 words. That's your target for a fiction author bio - and it's tighter than most writers expect. For blog posts the ceiling sits at 60 words, and general online bios run 50–100, but fiction showcases demand sharper editing. Readers browsing book pages don't linger; they scan.
Before you touch your WordPress dashboard - before you even think about headshots or plugin settings - draft the content first. Getting the words right is the foundation everything else sits on.
Third person is non-negotiable. "Sarah writes dark fantasy from a crumbling Victorian terrace in Edinburgh" reads far better than "I write dark fantasy." It's industry standard, and it makes listing achievements feel like fact rather than bragging. One client of mine resisted this for months, insisting first person felt "more authentic." Her bio read like a cover letter. She switched, and the difference was night and day.
So what actually goes in those 50 words? Prioritise in this order:
- Your name and what you write (or your day job if it's relevant to the book)
- Your strongest professional credential - a published novel, a notable award, or for debut authors, short story publications or bylines
- Relevant education, but only if it directly connects to your genre (a criminology degree matters for a crime thriller; a business MBA probably doesn't)
- One personal detail that humanises you - where you live, a quirk, something readers can latch onto
Debut authors often panic here because they feel they have nothing to list. They do. Published short fiction, online articles, even a well-read column counts. Showcase what exists, not what's missing. A bio that confidently presents three modest achievements beats one that apologises for not having more.
Two pitfalls kill more bios than anything else. First, specific dates. "Her 2021 debut novel" sounds fine today and dated in three years - write "her debut novel" and keep it evergreen. Second, phrases like "coming soon" or "upcoming release." By the time a reader finds your bio six months from now, that book is either out or the phrase is embarrassing. Cut it.
For fiction writers especially, the personal touch carries more weight than people realise. The strategic storytelling principles you've already mapped out apply directly here - a single sentence about romance conflict resolutions that shaped your writing, or the obsession that drove you to your genre, does more to grab audience attention than a list of credentials ever will.
Avoid dating the bio and avoid padding it. Every word should earn its place. If a sentence doesn't tell the reader who you are, what you write, or why they should care, cut it.
Draft two versions while you're at it: a short one under 50 words for fiction showcases, and a longer one around 100 words for your archive page. Having both ready - alongside your headshot at the correct 1400px minimum width - means the actual WordPress setup takes minutes rather than hours.
The Perfect Headshot and Why it Matters
A blurry, poorly lit snapshot does more damage than no photo at all. Readers form a first impression of you as an author in under a second, and your headshot carries that weight entirely on its own before they read a single word of your bio.
This isn't a cosmetic detail. Your headshot is the primary trust signal in your author bio - the visual handshake that tells a reader whether you're someone worth following. For fiction authors especially, where personal connection drives loyalty, a weak photo is a conversion killer.
So what makes a headshot work? It needs to be professional, approachable, and technically sound. Professional means a clean background, decent lighting, and a photographer who knows what they're doing.
Approachable means you look like someone a reader would want to spend time with - not a corporate LinkedIn mugshot. These two qualities pull in opposite directions, and the best author headshots find the exact middle.
Technical Specifications That Actually Matter
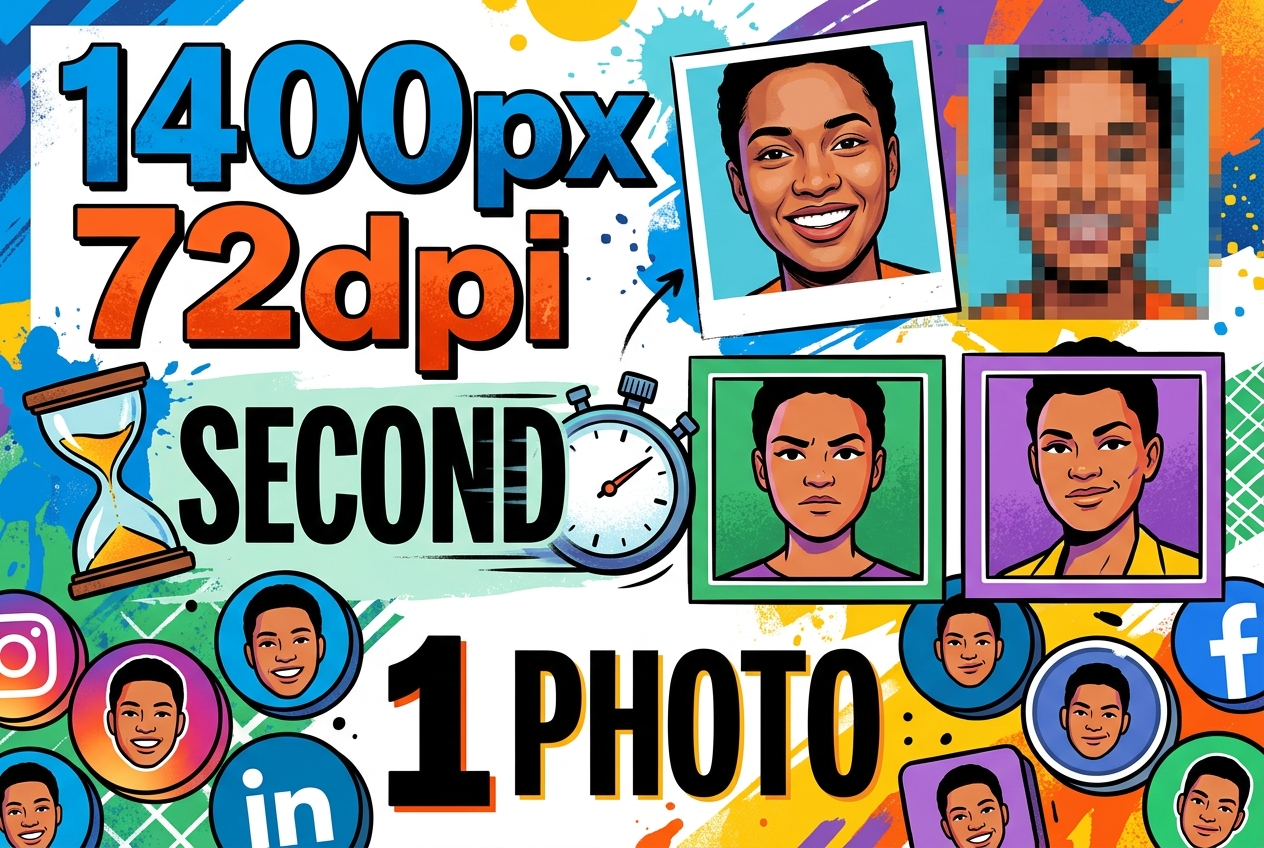
On the technical side, the numbers are non-negotiable. Your image needs to be at least 1400 px wide at 72dpi resolution, with an aspect ratio of 2:3 or 3:4. Those dimensions give WordPress and any author bio plugin enough pixels to render your photo cleanly at any display size - including when you eventually work through the upload process in your WordPress profile settings.
Anything smaller and you risk a pixelated result that undermines the entire bio. I've seen authors spend hours crafting the perfect 60-word bio, then pair it with a 300px thumbnail that looks like it was taken on a 2009 flip phone. Night and day difference in reader response.
Crop your headshot to a 2:3 or 3:4 ratio before uploading - don't rely on WordPress or a plugin to crop it correctly, as automated cropping often cuts off the top of your head or centres on your chin.
Consistent Branding Across Every Platform
Use the same headshot across every platform - your WordPress bio, Amazon author page, Goodreads profile, social media accounts, all of it. Readers who discover you on Instagram and then find your website should see the same face. Inconsistency signals either carelessness or multiple identities, neither of which builds the kind of trust that sells books.
Inconsistent branding is one of the most common mistakes I see from indie authors, and it's entirely avoidable. Pick one great photo and commit to it for at least two to three years.
Common headshot mistakes worth avoiding: heavy filters that alter your appearance, group shots where you're one of several people, photos taken at an angle that obscures your face, and anything where the background competes with you for attention. Your face should be the focal point, full stop.
A single, well-chosen headshot - correctly sized, consistently deployed - does something no amount of carefully worded text can replicate: it makes you real to a stranger on the internet.
You've done the hard work of crafting your bio - now it's time to get it into WordPress without breaking anything or leaving half the fields mysteriously blank (I've seen it happen more times than I care to admit). Getting your profile set up correctly from the start saves you from the embarrassing situation one of my clients faced: a beautifully written bio that simply never appeared on her site because the biographical info field sat completely empty for six months. From entering your text to sorting out your author image, the details here matter more than they look.
Inputting Your Bio Into WordPress Profile
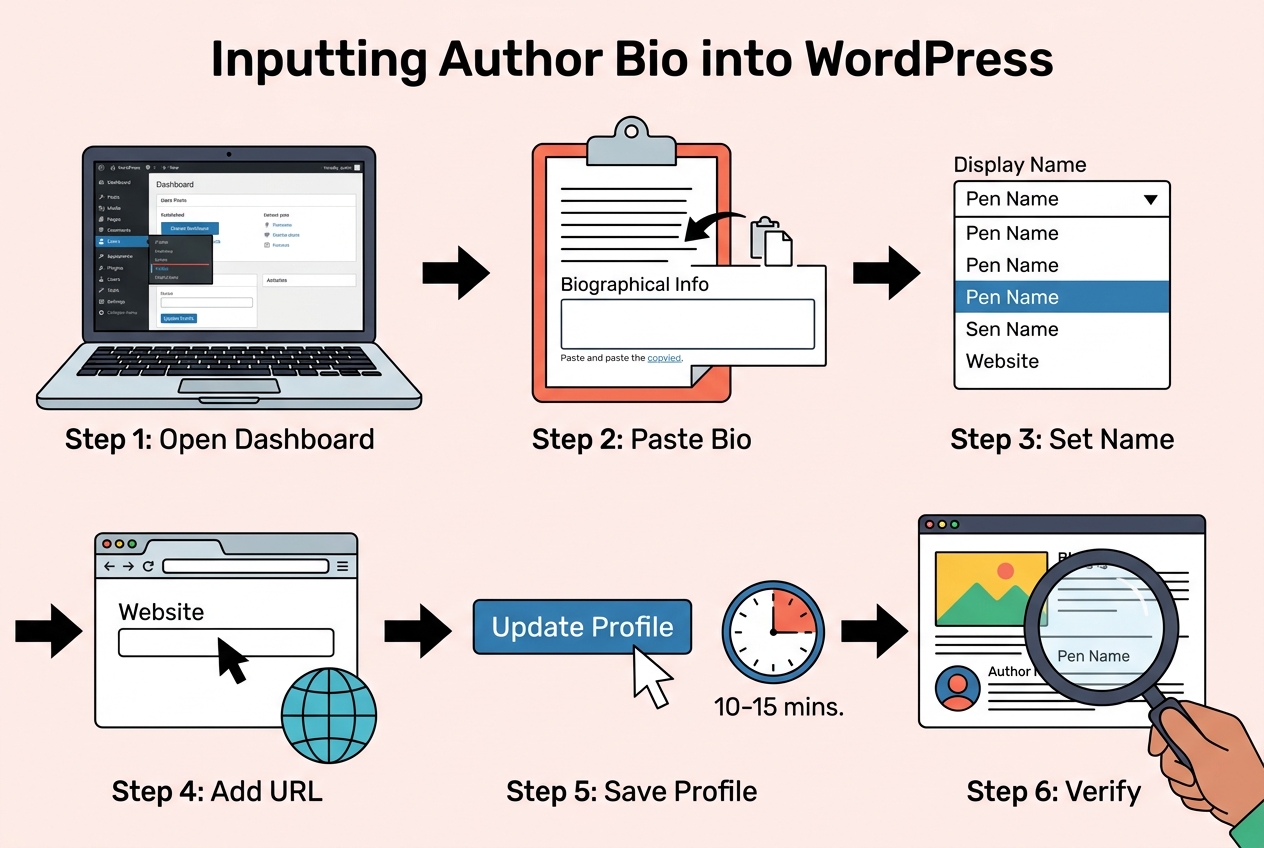
Open your WordPress dashboard, go to Users > Profile, and scroll down to the "About Yourself" section. That's where your bio lives - and where most authors discover they've left it completely blank.
Your drafted bio is ready. Paste it directly into the Biographical Info field. Don't retype it from memory; copy the final version you crafted earlier to avoid introducing errors or cutting sentences you meant to keep.
- Paste Your Bio Text - Copy your finished bio into the "Biographical Info" field under "About Yourself." WordPress accepts plain text here; basic HTML like
<a>tags for links works, but skip complex formatting - it renders inconsistently depending on your theme. - Set Your Display Name - Scroll to the "Name" section near the top of the profile page and check the "Display name publicly as" dropdown. This controls the name readers see on your posts and bio box. If you write under a pen name, this is where you set it - not your username, which is locked after account creation.
- Enter Your Website URL - Fill in the "Website" field with your author site address. Many author bio plugins pull this automatically, so a missing URL here means a broken or absent link in your displayed bio.
- Save the Profile - Click "Update Profile" at the bottom. Nothing saves automatically. I've watched authors spend twenty minutes perfecting their bio text, close the tab, and lose every word.
The whole process takes 10–15 minutes once you have your content ready. That's it. No coding, no plugin required at this stage - though plugins become relevant the moment you want your bio to look like something beyond a plain text block appended to your posts.
The display name setting is the one field authors consistently overlook. WordPress defaults to your username, which is often something unglamorous like "admin" or "jsmith84." Readers see that name on every post. Fix it now.
One firm recommendation: keep your bio under 100 words in this field. The research is consistent - bios between 50 and 100 words perform best for general use, and for fiction specifically, under 50 words is the target. Longer text doesn't get read; it gets scrolled past.
A common failure point is the empty field problem. If the "Biographical Info" box is blank, WordPress has nothing to display - no plugin will conjure text from an empty field. Sounds obvious, but it accounts for a surprising number of "my bio isn't showing" support threads.
After saving, navigate to any published post on your site and check the author credit. Verify the display name reads correctly and the bio text appears where your theme or plugin expects it. A 10-minute check now prevents a silent error sitting on your site for months.
Avatar Options: Gravatar or Local Uploads
WordPress resolves your author avatar through a specific lookup chain: it takes the email address on your user profile and queries Gravatar (Globally Recognized Avatar), a third-party service owned by Automattic, the same company behind WordPress.com. If that email matches a registered Gravatar account, your photo appears automatically across every WordPress site using that address. No manual upload required.
That sounds convenient. And it is - until it isn't.
The email dependency is where things quietly break. I've watched authors spend an hour troubleshooting a missing headshot, only to discover their WordPress profile uses a work address while their Gravatar account sits under a personal Gmail. The fix takes thirty seconds once you spot it, but finding it is the frustrating part. Check the email in Users > Profile first, always.
Gravatar also means your image lives on an external server you don't control. Load times, account changes, or simply forgetting to update Gravatar after a rebrand can all silently break the visual component of your bio - the part readers notice before they read a single word.
The cleaner alternative is a local upload plugin. Simple Local Avatar and User Profile Picture are the two most widely used options. Both add a direct image upload field to your WordPress user profile, bypassing Gravatar entirely. Your headshot stays on your own server, loads with your site, and updates the moment you replace the file.
- Simple Local Avatar: lightweight, adds one upload field to the profile page, no settings panel needed
- User Profile Picture: slightly more featured, supports front-end profile editing, useful if you run a multi-author site
For a solo fiction author showcasing a single book, Simple Local Avatar is no contest - install, upload your professional headshot, done. User Profile Picture earns its place on sites where contributors manage their own profiles.
One conflict worth knowing: if you run a dedicated author bio plugin alongside a separate avatar plugin, they sometimes compete over which image to display. The bio plugin pulls from one source; the avatar plugin registers another. Verify in your bio plugin's settings which image field it reads from, and point both to the same source. Some authors sidestep this entirely by using a bio plugin that handles image uploads natively - a consolidation approach that starts to look very attractive once you're managing headshots, bio text, and social links as separate moving parts.
On image specs: your headshot should already be sized correctly from the preparation stage, but confirm the plugin isn't scaling it below 98×98 pixels at display - that's the floor before compression artifacts make a professional photo look amateurish. Most themes render bio avatars between 96 and 150 pixels square, so a source file of at least 300×300 pixels gives you clean output at any size.
Getting the avatar right is a solved problem with either method. The harder question is what surrounds it - how the headshot, bio text, genre credentials, and social links get assembled into something that actually looks intentional on the page.
Getting your author bio written is only half the battle - how you display it on your WordPress site can make the difference between a polished book showcase and something that looks cobbled together at midnight. Plugins handle the heavy lifting for most authors, but they are not always the right answer, and blindly installing the first one you find is a mistake I have watched plenty of clients regret. Knowing when to reach for a plugin, when to trust your theme, and when a few lines of custom code will serve you better is exactly what this chapter tackles.
Choosing the Right Author Bio Plugin
Pick the wrong plugin and your author bio becomes a liability - broken layouts, missing headshots, social links pointing nowhere. Pick the right one and your bio becomes a polished, clickable asset that earns its place on every book showcase page.
Seven plugins dominate this space: Simple Author Box, WP Post Author, PublishPress Authors, Molongui Authorship, Starbox, Authorsy, and Author Kit. Each pulls your headshot, name, bio text, and social links into a styled author box automatically - no template editing required. That last part matters more than most authors realise.
After reviewing dozens of client setups, the pattern is clear: authors who reach for manual code first spend 1–3 hours wrestling with single.php for a result a plugin delivers in under 45 minutes. Plugins win on speed. They also win on reliability.
| Plugin | Best For | Key Feature | Multi-Author Support |
|---|---|---|---|
| Simple Author Box | Solo authors, quick setup | Clean box with social icons | Limited |
| WP Post Author | Design-conscious authors | Multiple box templates | Yes |
| PublishPress Authors | Co-authored books, series | Multiple authors per post | Strong |
| Molongui Authorship | SEO-focused setups | Built-in schema markup fields | Yes |
| Starbox | Visual customisation | Drag-and-drop layout editor | Yes |
| Authorsy | Modern aesthetic | Lightweight, fast-loading | Limited |
| Author Kit | Gutenberg-first workflows | Block editor integration | Yes |
Installation is dead simple. Find your chosen plugin under Plugins > Add New, install, activate. Configuration lives either under Appearance > Customize or a dedicated menu item the plugin adds to your dashboard sidebar.
If your fiction showcase targets a specific genre community, configure your plugin to display social links for the platforms that community actually uses - Instagram and TikTok for romance and fantasy readers, not LinkedIn.
Molongui Authorship is worth a closer look if you care about search visibility. Its settings include dedicated fields for structured data - the kind of author markup that feeds into how Google evaluates credibility signals, which connects directly to keyword and schema considerations you'll want to address later.
For social and website links, most plugins pull the URL you already entered in your WordPress profile. Some offer additional fields for platforms WordPress doesn't natively support. Fill every relevant field. A fiction reader who clicks your Instagram link and hits a dead end is a lost connection.
My recommendation: solo fiction authors should start with Simple Author Box or WP Post Author. Authors managing a series with guest contributors need PublishPress Authors - nothing else in this list handles multi-author attribution as cleanly.
Plugins solve the display problem elegantly. But they do assume your theme cooperates, which isn't always a safe assumption.
When to Consider Manual Code or Theme Options
Plugins handle the heavy lifting for most authors, but they're not the only path to a well-displayed bio. Two alternatives exist for those who want tighter control: editing your theme's template files directly, or using what your theme already provides.
Manual code implementation means opening your theme's single.php file and adding PHP to pull author data, paired with CSS to style it. You're working directly with WordPress's native get_the_author_meta() functions and writing your own markup from scratch. No plugin overhead, no dependency on a third party's update schedule.
The tradeoff is real, though. Budget 1–3 hours depending on your familiarity with PHP and your theme's structure - that's not a weekend afternoon project for someone who last touched code in 2019. And every time you update or switch themes, you risk losing those customizations entirely unless you're working inside a child theme.
One client I worked with spent an afternoon getting a beautifully minimal bio box coded into her thriller site, then updated her parent theme two weeks later. Gone. A child theme would have prevented that entirely. Always work in a child theme when editing template files.
The CSS side is more forgiving. Basic considerations like font size, padding, border styling, and avatar alignment can be adjusted through the WordPress Customizer's Additional CSS panel without touching single.php at all. That's a reasonable middle ground if you only need cosmetic tweaks rather than structural changes to what data gets displayed.
Theme-native author box options are worth checking before you reach for either a plugin or custom code. Divi, for example, ships with a built-in author box module that you configure through its visual builder - no PHP required. If you're already running a theme with this capability, adding a plugin on top creates unnecessary redundancy and potential style conflicts.
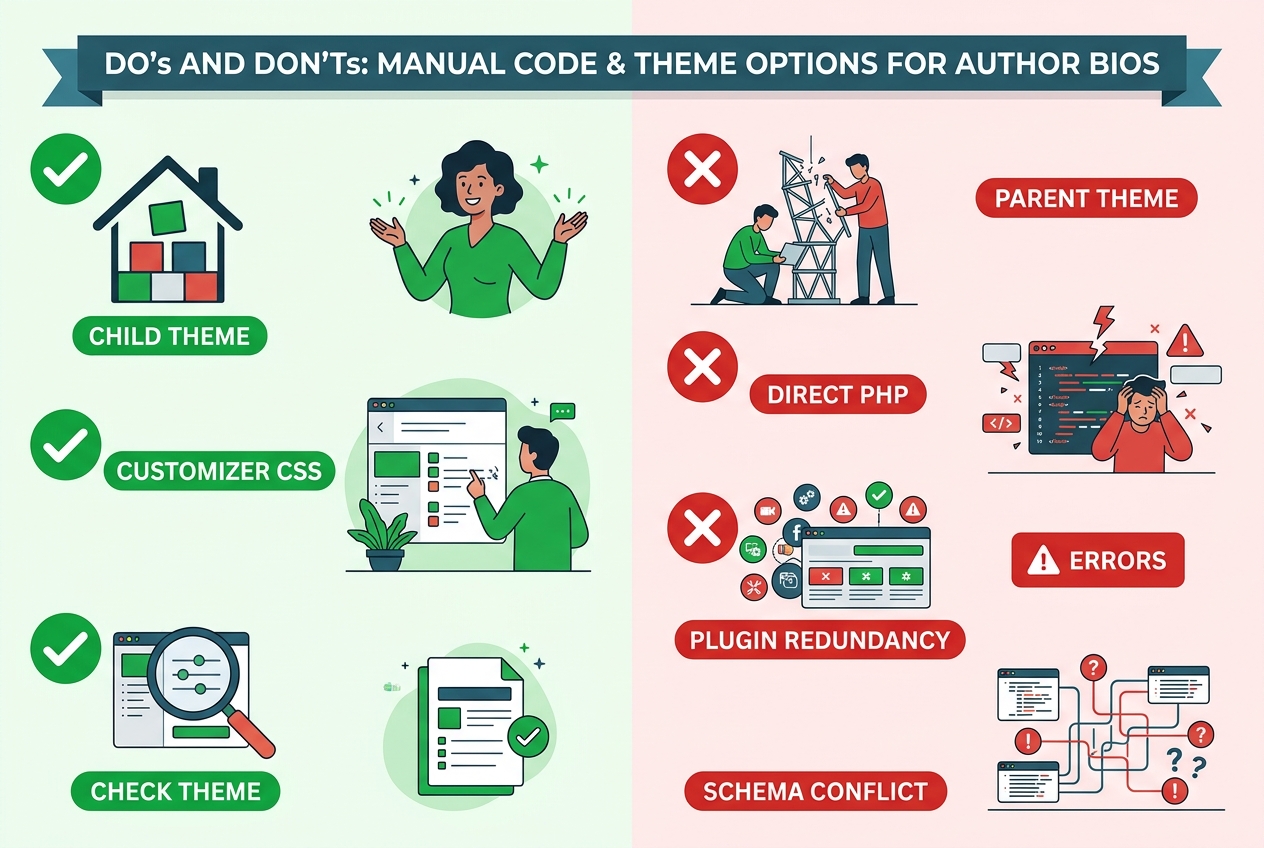
- Check your theme's documentation for "author box" or "post author" options before installing anything
- Use manual code only inside a child theme to survive parent theme updates
- Limit CSS edits to the Customizer's Additional CSS panel for non-structural changes
- If your theme and an author bio plugin both output author schema markup, pick one source - duplication causes SEO plugin conflicts
That last point matters more than it seems. When both your theme and an SEO plugin like RankMath try to write author schema simultaneously, the output gets messy - and structured data accuracy directly affects how search engines read and surface your author information.
The honest recommendation: if your theme offers a native author box and it covers your needs, use it. If you need precise control over markup and you're comfortable in PHP, go manual - but do it properly. Plugins win on convenience, not capability.
A polished author bio means nothing if search engines cannot find it - and I have watched more than a few talented indie authors pour hours into their WordPress profiles, only to languish in obscurity because they skipped the SEO fundamentals. Getting discovered online is not reserved for authors with big publishing budgets; it comes down to deliberate, repeatable choices. From weaving the right keywords into your bio to implementing schema markup that signals your authority to Google, the technical side of visibility is more accessible than most authors realise.
Keywords and Author Schema for Discoverability
Authors who skip this step watch their beautifully crafted bio sit invisible in search results while writers with weaker prose rank above them. That's not a theory - it's a pattern I've seen repeat across dozens of client sites.
Your bio text is already written and displayed. Now you need search engines to actually understand it. Two tools do that work: keyword placement and schema markup.
Picking the Right Keywords
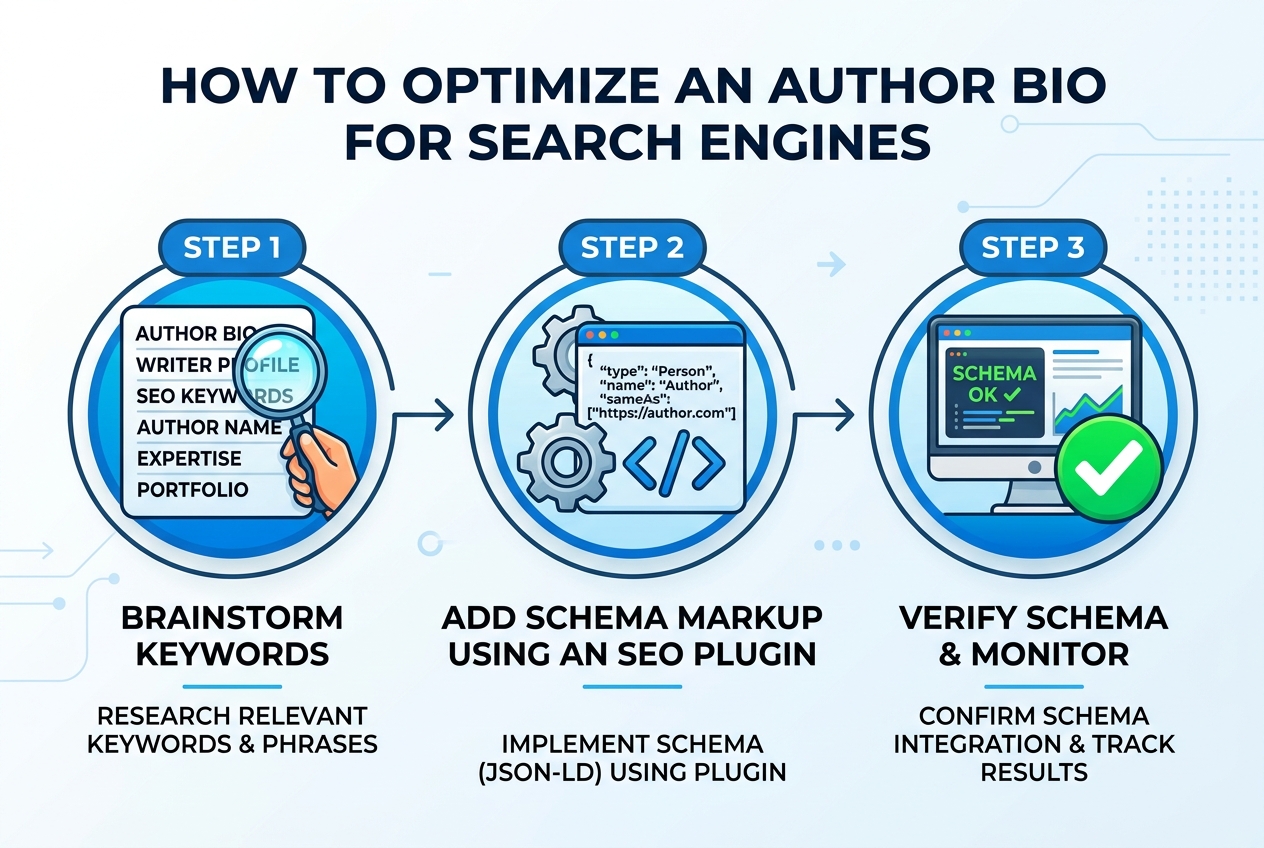
For fiction authors, the obvious answer is your genre - but that barely scratches the surface. Your keyword set should cover your job title ("fantasy author," "crime fiction writer"), your niche ("cozy mystery," "dark romantasy"), and any expertise that feeds your stories. A criminology degree behind a thriller series? That belongs in your bio and in your keyword thinking.
Weave these terms naturally into your bio text. Search engines read your biographical info field the same way they read any page copy - density and context both matter.
Schema Markup: What It Is and Why It Matters
Schema markup is structured data - code added to your page that tells search engines exactly what type of content they're looking at, rather than making them guess. For author bios, the relevant type is Person schema, which signals your name, role, and credentials in a format Google reads directly.
This directly supports Google's E-E-A-T guidelines - Experience, Expertise, Authoritativeness, Trustworthiness. When Google can verify you're a real author with a defined genre and published work, your content earns more weight in rankings. It also helps AI-powered search tools surface you correctly.
If you ever run a full audit of your setup - which you'll want to do before calling the whole configuration complete - Google's Rich Results Test will show you exactly whether your Person schema is being read correctly.
Adding Schema With RankMath or Yoast SEO
You don't need to hand-code JSON-LD. Both RankMath and Yoast SEO handle author and Person schema through their plugin settings - no developer required.
- Install RankMath or Yoast SEO and complete their setup wizard.
- Navigate to the plugin's Knowledge Graph or Site Identity settings.
- Set the site as representing a "Person" rather than an organization.
- Enter your name, author URL, and relevant profile links.
- Save and verify output using Google's Rich Results Test tool.
One conflict worth watching: some author bio plugins also try to output schema. If both your author box plugin and your SEO plugin generate Person markup simultaneously, Google sees duplicate structured data - which creates errors, not authority. Let your SEO plugin own the schema; disable that feature in your author box plugin if the option exists.
SEO optimization takes 15–30 minutes when you know what you're doing. That's a short window to turn a static bio into a signal that search engines actively use to rank your book showcase pages.
Ensuring Author Pages are Indexed
Your author archive page is a separate SEO asset - not just a list of posts. It's a dedicated URL where search engines can index your name, your bio, and your body of work as a single, coherent entity. Ignoring it means leaving a significant slice of your discoverability on the table.
WordPress creates author archive pages automatically. The URL typically follows the pattern /author/your-username/, and it pulls together every post attributed to that user. No custom setup needed - in theory. In practice, several things can quietly break this.
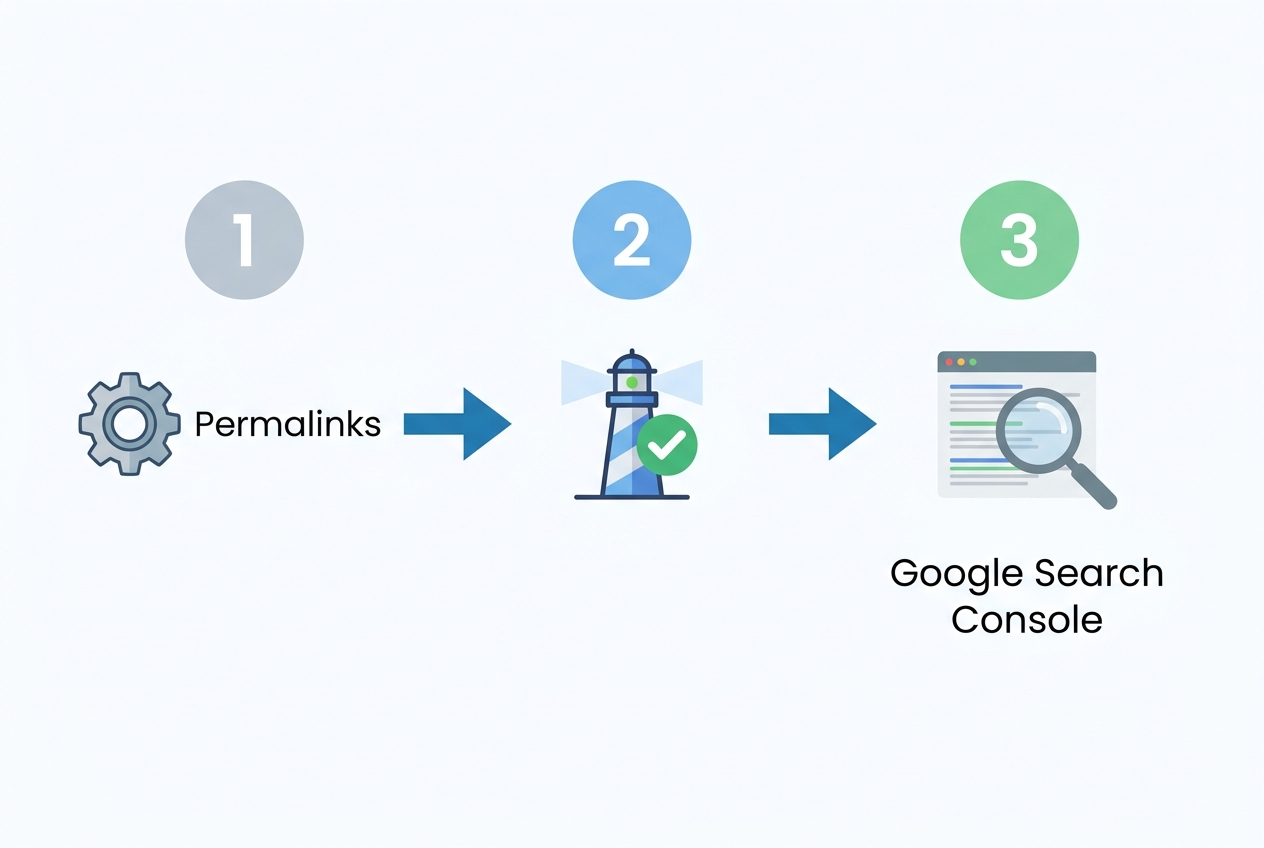
The first thing to check is your permalink structure. If WordPress is still running on the default ?p=123 query-based permalinks, your author archive won't resolve cleanly. Go to Settings > Permalinks and switch to any of the named structures - "Post name" is the cleanest option for author pages specifically.
After that, check your SEO plugin. This is where I've seen the most damage done. Yoast SEO and RankMath both have a setting that controls whether author archives are indexed or redirected.
If someone toggled "Disable author archives" at any point - often to suppress thin content on multi-author sites - your page is effectively invisible to Google. In Yoast, that setting lives under SEO > Search Appearance > Archives.
In RankMath, check Titles & Meta > Authors. Flip it back on, save, and resubmit the URL in Google Search Console.
Page builders complicate this further. If your site uses SeedProd or a similar tool that controls template routing, WordPress's automatic author archive generation can get overridden without any warning. You'll need to build a custom author archive template inside the page builder and assign it manually. For Showit users specifically, the page slug must follow the format author-[username] - get that wrong and the page simply won't resolve.
Before you go further, run a quick sanity check - type site:yourdomain.com/author/your-username into Google. If it returns nothing, you have an indexing problem. If it returns the page but with thin or broken content, that's a different issue worth addressing before you run any formal crawl audit.
- Confirm Permalink Settings - Navigate to Settings > Permalinks and verify you're using a named structure, not the default query string format.
- Check SEO Plugin Archive Settings - In Yoast or RankMath, confirm author archives are set to index, not disabled or redirected.
- Verify the Page Exists - Visit
/author/your-username/directly in your browser. A 404 means a routing problem; a blank page means the biographical info field is empty. - Build a Custom Template if Using a Page Builder - SeedProd, Showit, and similar tools require manual author archive templates. Don't assume WordPress's default kicks in.
- Submit to Google Search Console - Once the page is live and correctly configured, submit the URL for indexing rather than waiting for Googlebot to find it organically.
Author archive indexing is the single biggest gap I find when auditing indie author sites. The bio widget on individual posts matters, but the archive page is what builds cumulative authority - and that's what moves the needle for book discoverability over time.
Getting your author bio built is one thing - knowing it actually works the way readers will see it is another matter entirely. I've watched too many authors spend hours crafting the perfect bio, only to discover weeks later that their headshot was missing, a social link was pointing nowhere, or the bio text wasn't showing up at all. A quick, methodical review before you call the job done saves that embarrassment.
Here, you'll learn exactly what to check on your live site and how to fix the most stubborn display problems when they appear.
Reviewing Your Live Author Showcase
Your author bio is live - and that's exactly when the real work begins. A bio that looks perfect in the WordPress dashboard can break, misalign, or simply vanish on the front end, and every hour it sits broken is an hour a potential reader lands on your book showcase and finds a half-finished page instead of a compelling author presence.
Start by visiting an actual published post. Not the preview. The live URL, in a fresh browser tab, logged out of WordPress. You need to see exactly what a reader sees - no admin toolbar, no editor context, no shortcuts.
Your Review Checklist
- Bio text displays fully - if the "Biographical Info" field was left empty at any point, the box renders blank. Confirm every word shows.
- Headshot appears correctly - check that your image loads, crops cleanly, and matches the professional photo you prepared. A broken image tag here is a credibility killer.
- Every link works - click your website URL, click each social profile. Broken links are almost always a typo or a missing
https://prefix in the profile fields. - Your display name matches your author brand exactly as intended.
- The bio box styling fits your site's design - fonts, colours, spacing. If something looks off, check whether your theme's CSS is overriding the plugin's styles.
- The bio appears on all relevant post types, not just the one you're looking at. Some plugins scope display by post type by default.
Device testing is non-negotiable. Pull up the page on your phone. Then a tablet if you have one. The bio box that looks elegant on a 27-inch monitor often collapses into an unreadable stack on mobile - headshot oversized, text truncated, social icons misaligned.
Browser inconsistencies are rarer now, but still worth 10 minutes of your time. Check Chrome, then Firefox, then Safari if you can. Styling conflicts between your author bio plugin and your theme tend to show up differently across rendering engines.
After any change - styling tweak, link correction, image swap - clear your site's cache before re-checking. I've watched clients spend 45 minutes convinced their plugin was broken when the cache was simply serving the old version. Dead simple fix, endlessly overlooked.
The full review process runs 10 to 15 minutes when everything is already configured. Factor that into your total build time: the overall process from drafting to a verified live bio sits at roughly 2 to 6 hours, and skipping this final step is how you waste the preceding five.
Branding consistency deserves a specific check here. Confirm the headshot on your WordPress bio matches what's on your social profiles - the same photo you set up across platforms during the preparation phase. Readers who find you through your book showcase and then visit your Instagram should recognise you immediately. Inconsistency reads as disorganisation, and disorganisation erodes trust before a single page of your fiction gets read.
Fixing Missing Bios, Pictures, or Broken Links
Your live review flagged something - a blank bio box, a grey avatar placeholder, a link that goes nowhere. These aren't random glitches. Each one has a specific cause, and every single one is fixable in under five minutes once you know where to look.
After reviewing dozens of author setups that broke silently after launch, the pattern is clear: the most common failure point is the one readers see first - the biographical text itself simply never got entered.
Step-by-Step Fixes for Each Common Problem
- Missing Bio Text - Go to Users > Profile in your WordPress dashboard and check the Biographical Info field. WordPress does not auto-populate it. If it's empty, your bio box renders as a hollow shell - styled container, zero content.
- Profile Picture Not Appearing - Start with Gravatar. The email address in your WordPress user profile must exactly match the email tied to your Gravatar account. One character off and the avatar won't pull. If you're running a separate profile picture plugin alongside your author bio plugin, check compatibility - they frequently conflict. As a cleaner fix, configure your author bio plugin to use its own image upload feature and cut Gravatar out of the equation entirely.
- Broken or Misdirected Links - Open your WordPress profile or your plugin's settings and read every URL character by character. Missing
https://prefixes are the dead-simple culprit in roughly half the broken-link cases I encounter. Also verify that your plugin is actually configured to display and link those social fields - some plugins hide them by default. - Styling That Looks Wrong - Check your plugin's customization panel first. Most author bio plugins give you full control over colors, fonts, and layout without touching a line of code. If the box still looks off, your theme is likely overriding plugin styles. Add targeted custom CSS through the WordPress Customizer or directly in your theme's
style.cssfile. After any design change, clear your site cache - you're not seeing the live version until you do.
If your author bio plugin and your SEO plugin both manage author schema, they will conflict. Assign schema output to one tool only - RankMath or Yoast - and disable that feature in the author bio plugin.
One issue that catches authors off guard: bios that appear on some posts but not others. That's almost always a plugin scope setting. Dig into your plugin's configuration and confirm it's set to display on all relevant post types, not just the default.
A bio that doesn't show up consistently is functionally invisible to readers landing on different pages of your book showcase - and invisible bios do zero marketing work. Fix the scope setting, and the bio appears everywhere it should, doing its job on every page a reader might land on.
Conclusion
Your author bio is not a box you tick once and forget. It is a working piece of your book's marketing, sitting on every post, every showcase page, every archive - quietly doing a job every time a reader lands on your site.
I have watched authors spend weeks agonising over cover art, then copy-paste a two-sentence bio they wrote in 2019 and call it done. That is the equivalent of hanging a beautiful shop sign and leaving the window display empty. Readers who get past your cover and your blurb will look at you next. Give them something worth reading.
- Keep the fiction bio under 50 words. Tight, third-person, and genre-relevant. Every sentence earns its place or it gets cut.
- Your headshot needs to be at least 1400 px wide and consistent across every platform. Inconsistent visuals erode trust faster than a weak bio does.
- An empty "Biographical Info" field in your WordPress profile is the single most common reason author bios display nothing. Check it. Seriously, go check it right now.
- Keywords and Person schema markup - added through RankMath or Yoast SEO in under 30 minutes - are what make your bio visible to search engines and AI tools, not just human visitors.
- Author archive pages need to be indexed. A bio no search engine can find is a marketing asset with the lights off.
Two things you can do today. First, open your WordPress dashboard, go to Users > Profile, and read your current bio as if you are a stranger. Does it name your genre?
Does it give a reader a reason to care? If not, rewrite it - aim for under 50 words, third person, no time-sensitive phrases.
Second, install RankMath or Yoast SEO if you have not already, and configure the author schema for your profile. That is a 15-to-30-minute task with a direct impact on discoverability.
A well-crafted author bio does not require a developer, a big budget, or a marketing degree. It requires honesty about what it is: a strategic asset that either works for your book or sits there wasting the space.

